September Special Offer - 5% OFF SITEWIDE!
Use code:
IMPORTANT: To ensure a successful installation of the lifetime version of Office, we recommend that you uninstall any previously installed versions of Office on your computer, including Office 365, as it may cause conflicts during installation. Please follow the steps in this guide
IMPORTANT: For this process, you won't need to make any actual phone calls. The entire procedure will be carried out through Microsoft's official self-service website.
Obtain the official installer from Microsoft – You can download the Microsoft Office 2021 installer (ISO file) directly from Microsoft’s servers using:
Download Office 2021 Professional Plus
2.1 Install the soIftware – Open the downloaded file by double-clicking it to view its contents. Then, to begin the installation process, simply double-click the “Setup” file.

2.2 The installation procedure for Microsoft Office 2021 will commence automatically. Please allow the process to complete uninterrupted. The duration of the installation depends on network bandwidth and system performance; typically, it is completed within 10–15 minutes.
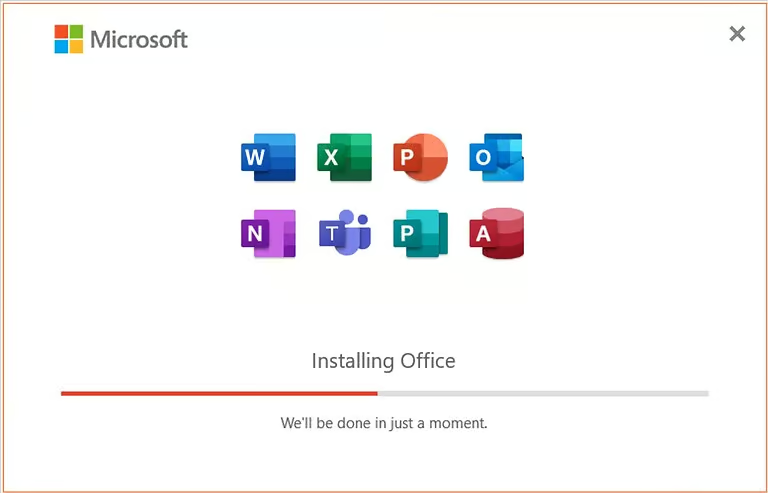
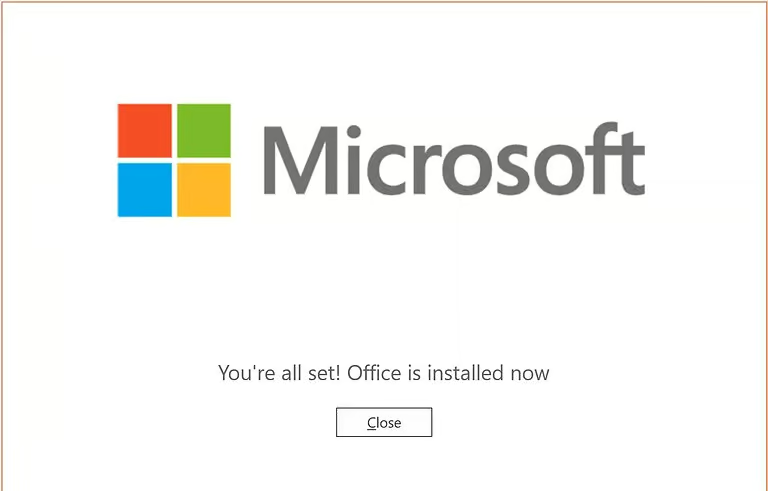
Upon successful installation, a notification window will be presented to confirm that Microsoft Office 2021 has been fully installed.
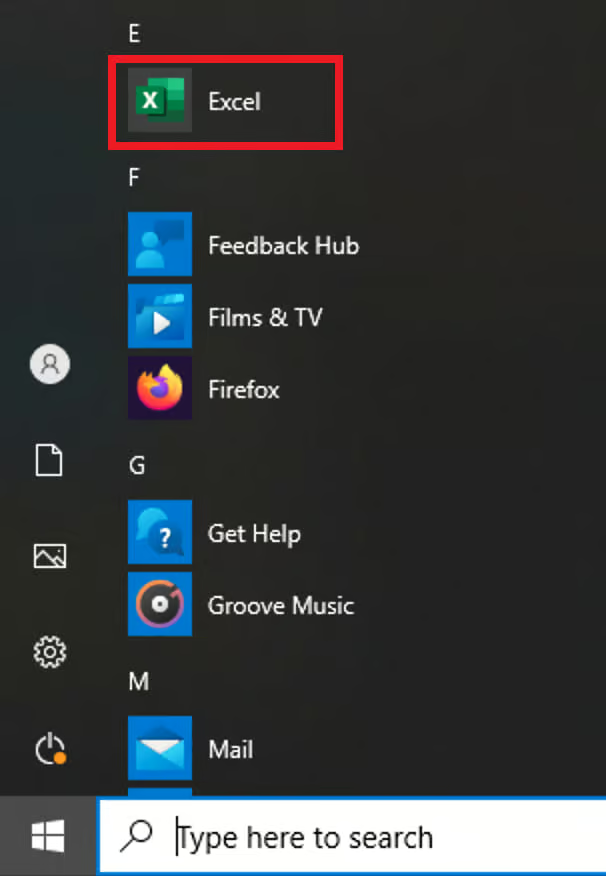
2.3 Once Microsoft Office 2021 has been installed, it must be activated. To initiate activation, launch any Office application, such as Excel.
For systems running Windows 10, open the Start menu, locate an Office 2021 application (e.g., Excel), and execute it to proceed with the activation process.
For systems running Windows 11, open the Start menu, navigate to All apps, locate Excel, and launch the application.
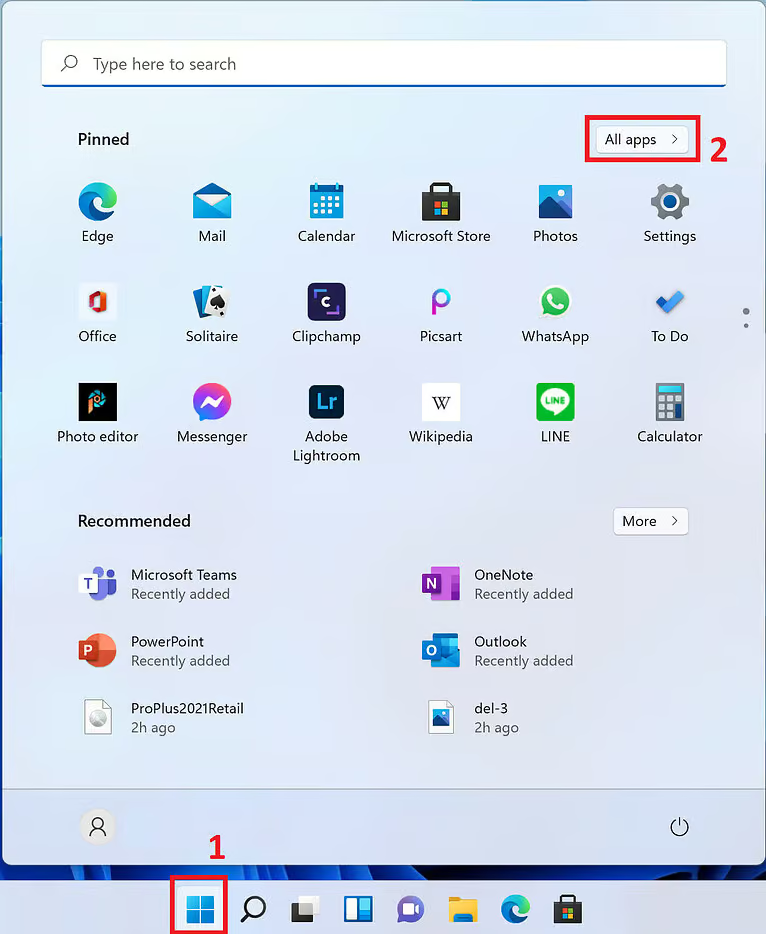
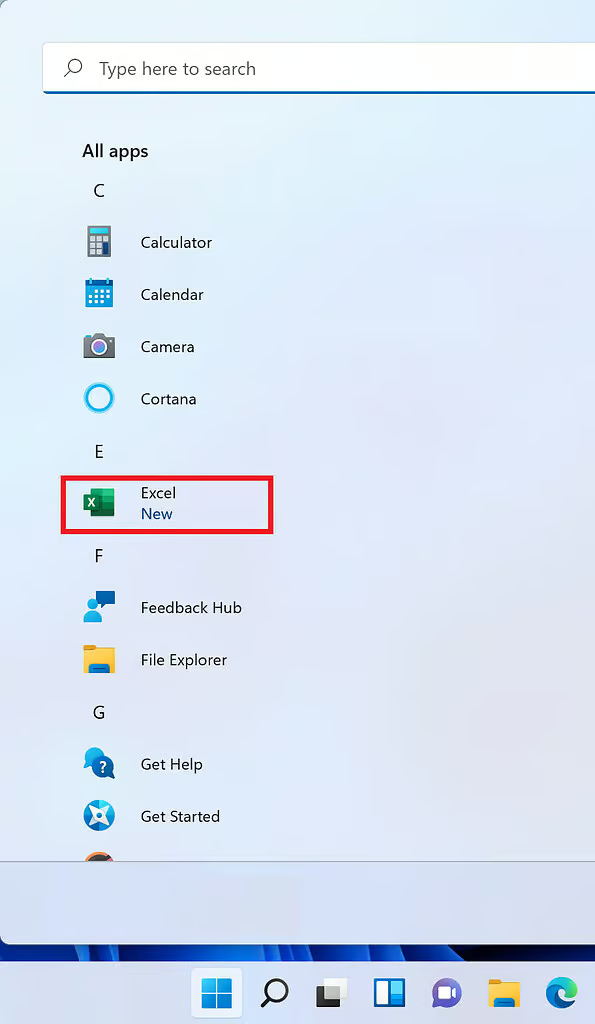
2.4 When opening the application for the first time, a window will be displayed requesting activation. Input your Microsoft Office 2021 license key in the provided field and click “Activate” to finalize the activation.
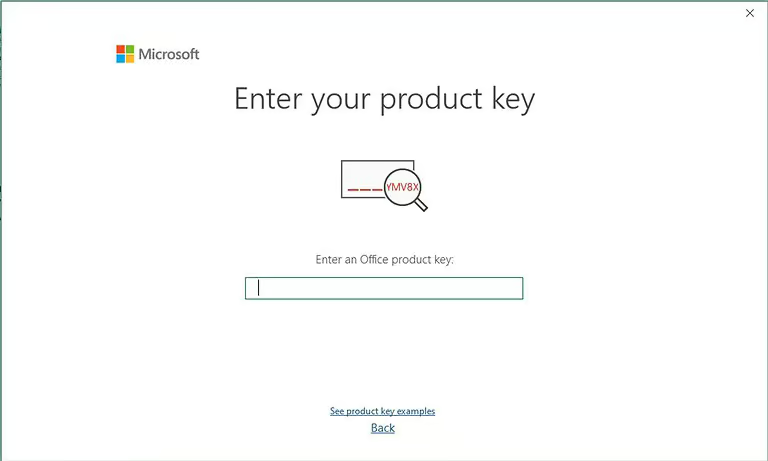
Confirm acceptance of the Microsoft Office license terms.
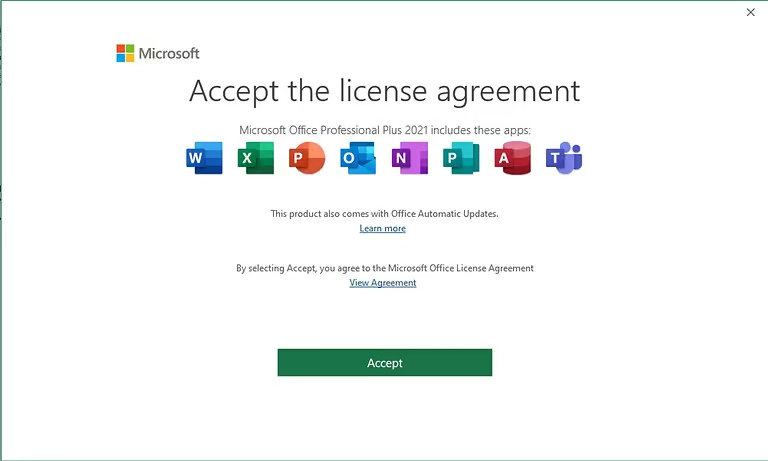
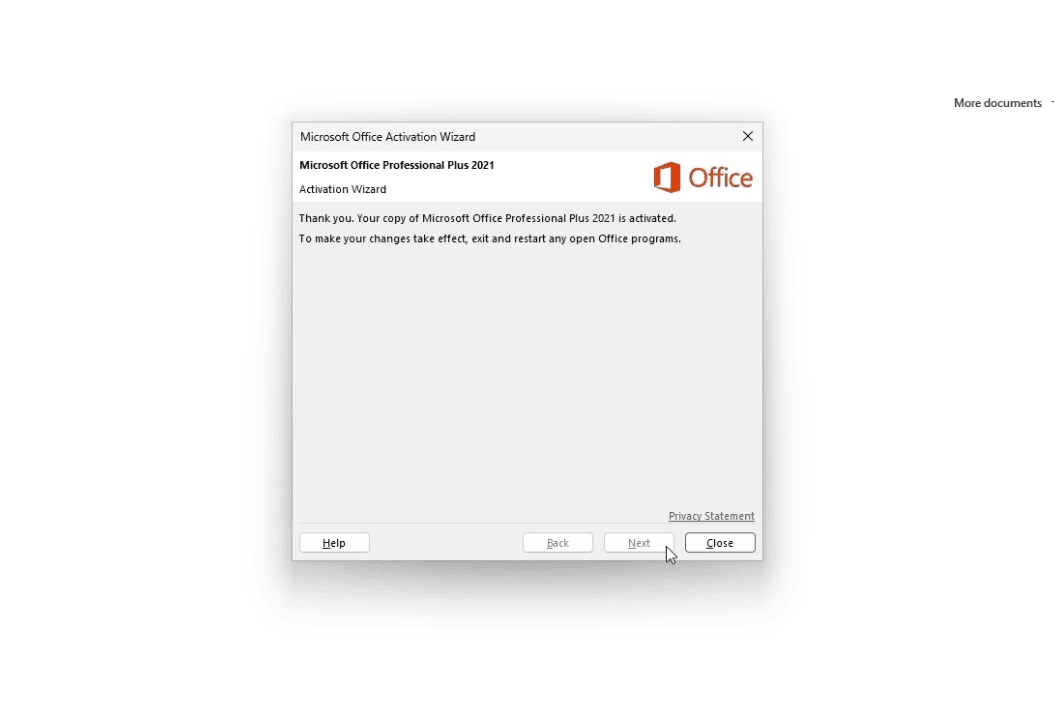
Activation successful. Check the current activation status within the “Account” settings.
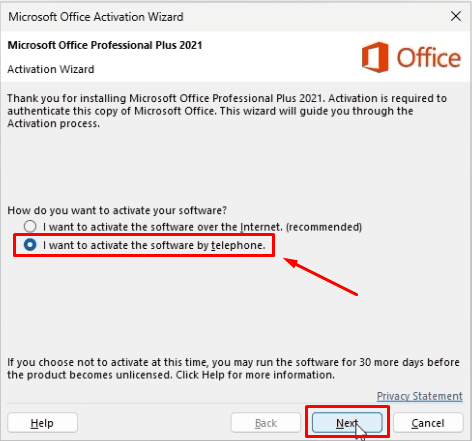
3.1 Open any application in your new Office suite (for example, Word or Excel). When it launches, the activation window will appear. Select the option that says “I want to activate the software by telephone” and click Next.
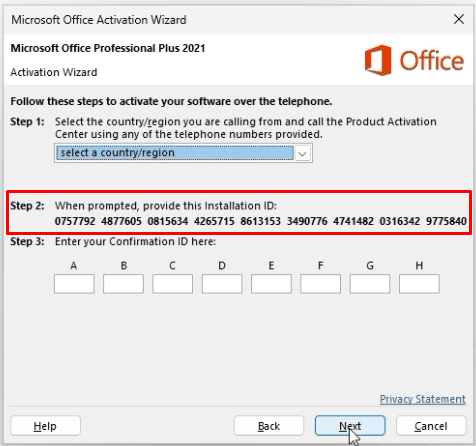
3.2 A new window will appear on your screen displaying your Installation ID. This is a 63-digit code (divided into several blocks) that is essential for the activation process.
3.3 From your browser, go to the official Microsoft activation website by clicking HERE. Once the page loads, click the “Let's get started” button and complete the security verification.

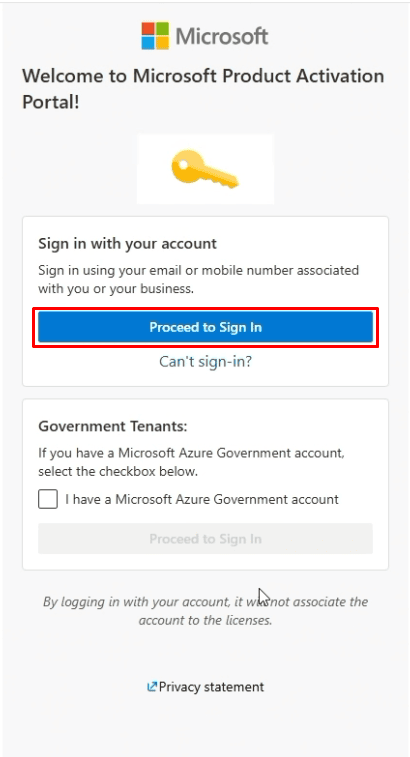
3.4 Click “Proceed to sign in.” You'll be redirected to the Microsoft sign-in page. Enter your email address and password, or use quick sign-in if you're already signed in on that device.
3.5 Once you're there, click the “Activate a Microsoft product” button. Then, from the list of options, select “Microsoft Office.”
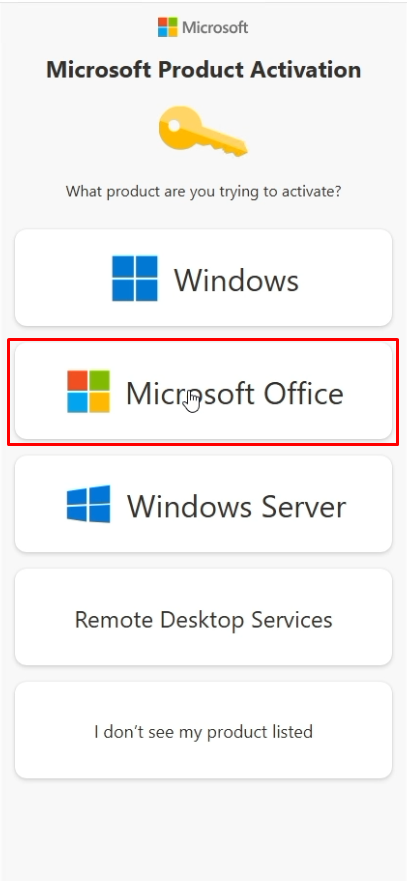
3.6 The system will ask you for details about your software.
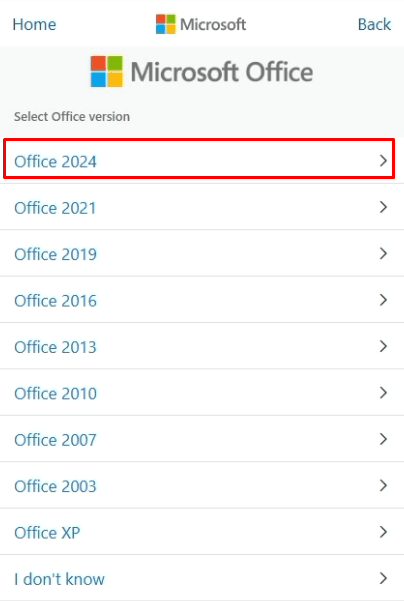
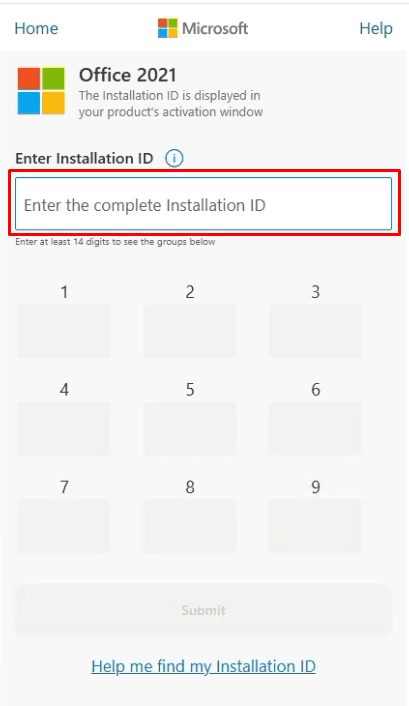
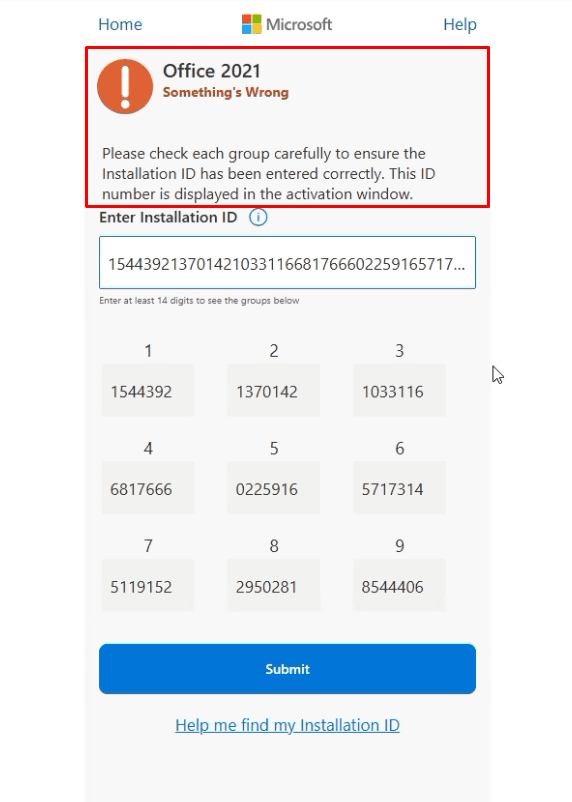
3.7 You will be taken to a new screen where you will see blank fields. Here, you must enter the 63-digit code (Installation ID) that we obtained in Step 2. After entering it correctly, click “Submit.”
IMPORTANT: If the system asks how many devices this product is installed on, enter the number corresponding to your license.
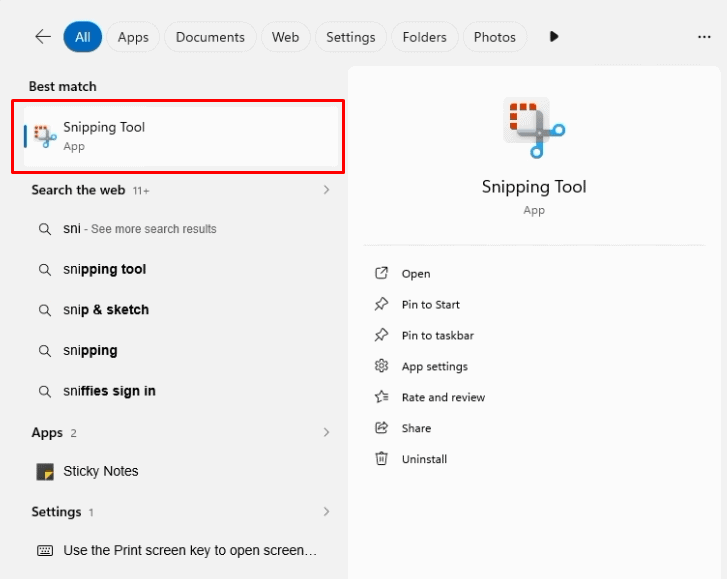
3.8 Now you'll have to use the screenshot tool that comes with Windows. Take a screenshot of the 63 digits.
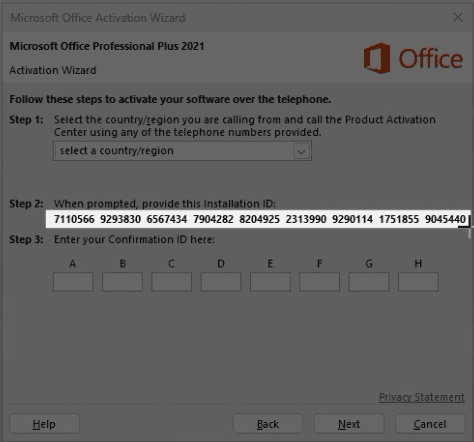
NOTE: At Licendeals, we offer the Installation ID Extractor, a tool that simplifies copying the 63 activation digits. Simply take a screenshot of the codes, save it as an image, and open it in the extractor to copy them accurately and without errors.
3.9 When you are in the ID Extractor, click "Click here drop your activacion screnshot" to upload the image containing the 63-digit ID, then click "Extract Installation ID", and finally select "Copy full ID".

3.10 Paste the code generated by the ID extractor from the previous step.
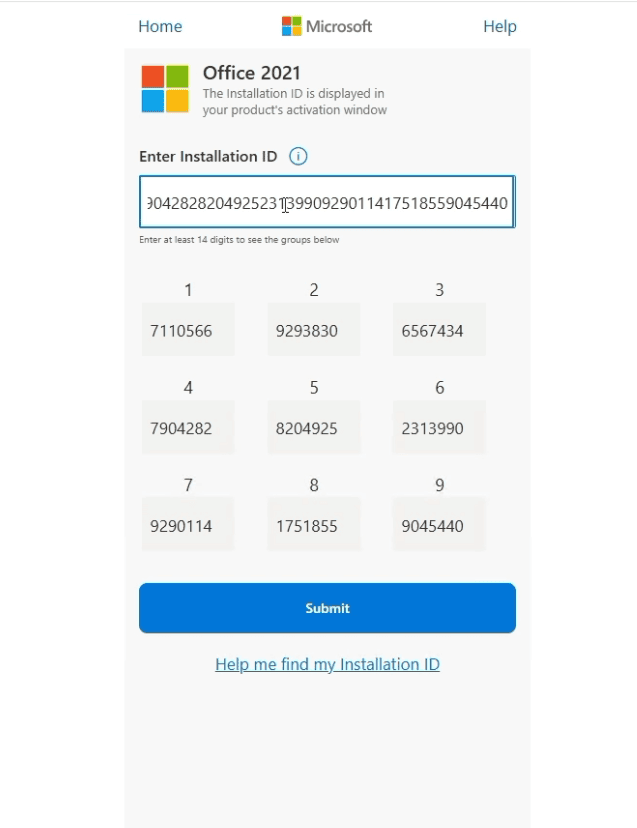
3.11 The website will automatically generate a new code called a Confirmation ID. Copy it or write it down carefully.
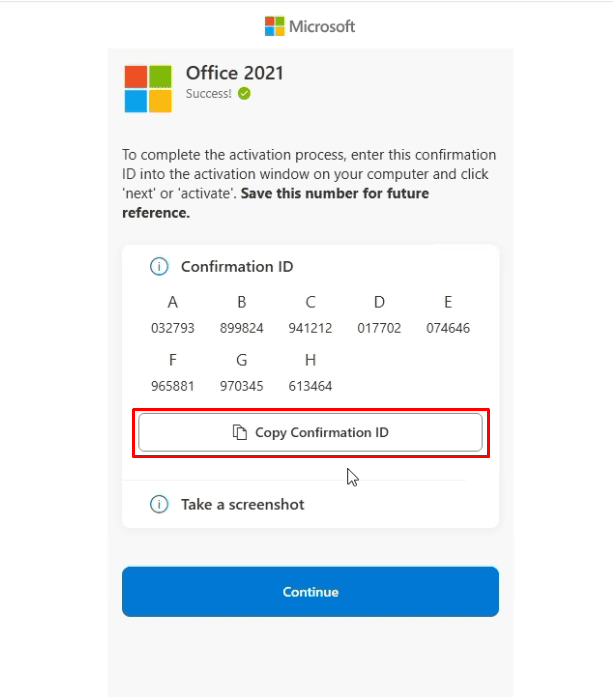
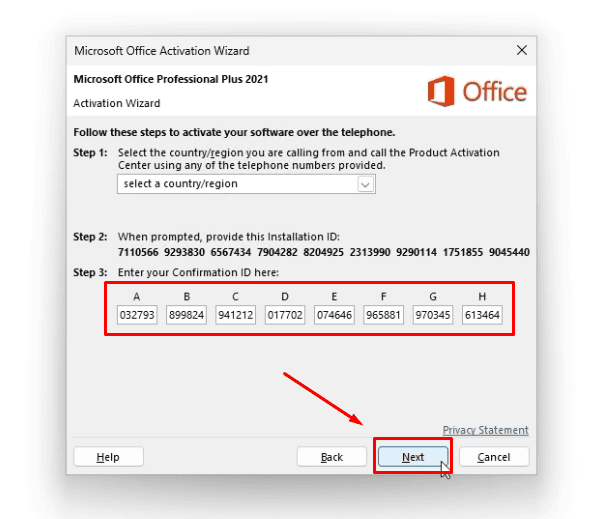
3.12 Finally, return to the Office activation window you left open on your computer, enter this Confirmation ID in the corresponding fields (blocks A through H), and click “Next.”
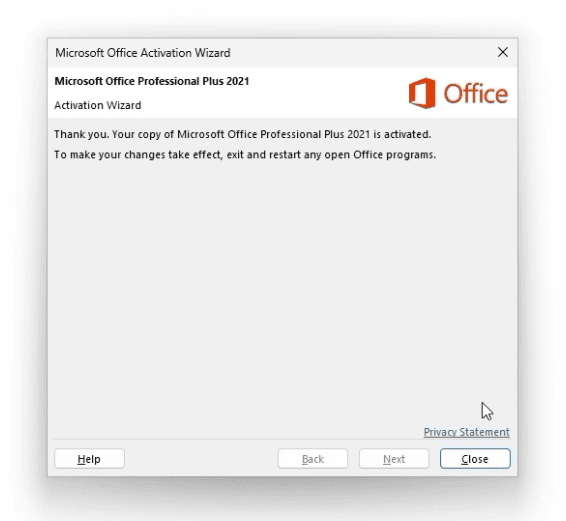
All done! You'll see a message confirming that your Office Professional Plus 2024 LTSC has been successfully activated and is now ready to use without restrictions.
NOTE: An error may appear on some devices; to resolve it, simply switch networks—either by using a VPN or by connecting to your phone's hotspot.
No account yet?
Create an Account


 Windows
 Office for PC
 Office for Mac
 Windows Server
 SQL Server
 Office Apps
 Visual Studio
